Friday, December 20, 2013

Energies of Today: Twas the Eve Before the Winter Solstice

Twas the Eve of the Winter Solstice

Happy Venus Day Fam! It’s Friday the eve of our 1st Winter Solstice since the 2012 ascension shift. We all know about the big 2012 scare of the world ending, in reality it was a huge shift into a different dimension for us humans and space family, it was a true spin in time for all of the universal cosmic fam, everything that exists has changed frequency. Since the 2012 shift into the Aquarian age and new dimension, it has become more apparent among all people that time has definitely sped up, we are no longer within that 24 hour window frame that mankind so lovingly placed us inside for their own control. I just don’t fight with time anymore! I will not try to control time and fall over to make it somewhere at a destined man made time marker. “In divine time”, has become my favorite slogan for 2013. Definitely all things happen as it should at the right time and place whether you feel it is a good or bad thing. So time as an essence and energy has sped up, which means that karma is right on your heels as well as our thoughts manifesting so much quicker than before. I mean, I speak and it is there. The energetic sparks that our minds are sending via our ancestors, spirit guides, or direct connection to the infinite (reiki) rains back down abundantly as well. I know the past two New Moons I planted seeds and when my crop arose from the Earth blessed by the heavens it was totally like boom, boom, boom! All at once everything rolled in, I mean you ask for abundance, be ready because we are in alignment for it to pour down, and I mean pour down literally! This is very exciting for us, especially those of us who put in the time to align our lives spiritually, do the work to better ourselves and humanity, as well as devoting our lives to serving our infinite. Being expressions of the infinite is such as beautiful thing, being on Earth is equally awesome. Though we have our obstacles that we’ve created for ourselves in our lives to grow stronger and expand in wisdom and love, we have been supplied with an immense amount of spiritual tools equipped with a plethora of wisdom since the first vibration of creation that consistently guides us. We are living in such a divine moment in space and time.

Allow this 1 year anniversary of our New Dimensional Living and Space Reality to be a blessing to you. Our Earth is in an excellent position with the Sun in our Milky Way Galaxy tomorrow at 11:11 am CST which will align us with the opportunity to tune into this vibrant energy of manifestation of all things we wish, dream and desire, with a special focus on finances, careers, travel, and home stability. When we have sacred alignments with our home Earth and cosmic family planets, Our Milky Way Galaxy serves as a portal where all of the abundant energy pours through from the space surrounding our galaxy. We have direct access to all things within our Galaxy and spiritually speaking we have to ascend before our access is granted to receive the highest potent forms of success, prosperity and increased awareness from the space outside of our galaxy. (Ascension is a DNA Upgrade where the remaining parts of your brain are awakened being no longer dormant and able to tune into different dimensions outside of ours, resulting in contact with space family that has the keys to ancient wisdom and guidance.) So if you are already in a spiritually high place and you are consciously aligned at a sacred place on Earth at this time when the portal opens up you will be immensely blessed and connected with the other realms outside of ours.

Last Solstice 12/21/2012 I organized a gathering on the ancient and sacred Cahokia Mounds East of Saint Louis, MO. We arrived around 5am to watch the Sun Rise and come in full speed. We were freezing, yet the energy was amazingly powerful and it carried us through the day, until noon time and into this year 2013. This year for me personally, I was able to accomplish lifelong dreams of traveling and living in Africa at the age of 26. I was able to pursue my dream of teaching Yoga in Ghana and studying Midwifery. This seemed so impossible before 2012, but being aligned with spirit and the sacredness of Earth I gained an immense amount of support and power from the cosmic heavens to manifest any and everything I wanted in the frame of divine time. You too can achieve and manifest all that you wish, be ready to receive because it is coming your way!

Message of the Day:
“Yes you are a soul star experiencing a physical life on Earth, yet study the stars and planets gently, they are within you and outside of you, and they will show you the way.”

Today’s Meditation:

Wait until about 3 hours after your last meal and find a quite space, bring along pen and paper. Create you sacred environment with candles, music and incense if needed. Smudge. Breathe long, slow and deep, quiet the mind, settle into your space. Allow your mind to drift to your purpose on Earth. See yourself on your path for the things you have accomplished before 2013. Then begin to see yourself as if you’re in a movie accomplishing your goals in 2013. Now see your future self in all of the things your soul needs your physical body, mind and heart to accomplish in 2014. Allow that energy to penetrate your space and take over your body, become this energy, get excited because it is manifesting as you think and breathe. After your thoughts and breathing return to normal, take the time to write down your goals for 2014. On the Solstice find yourself in a sacred place on Earth or a special place to you. Whether it is a Sunrise, 11:11 CST, or Noon Time charge your goal list, read aloud your desires, confirm them with a confident voice, feel them being accepted as you send them to the heavens through your ancestors and spirit guides. Bask in the energy of our Sun, Earth and Galaxy as it opens up. Enjoy!

Energies of Today:
Numerology: Today is 20 =2 day/December 20, 2013= 11/ Day 354/11 days left in year
Planet of the day: Venus/Friday~ Love, Friendship, Reconciliation, Beauty
Sun Sign: Sagittarius/ Fire Nov. 22nd-Dec.21
Moon Sign of the Day: Leo~ draws emphasis to the self, central ideas, institutions, success, power, luck, increased energy and awareness.
Herb of the Day:  Lavender, Rose, Jasmine, Hawthorn Berries
Essential Oil of the Day: Palmrosa, Lavender, Jasmine
Color of the Day: Pink, Red, Purple, Green
Chakra of the Day: Anahata~ 4th Chakra~ Heart Space
Sound of the Day: Yam
Incense of the Day: Yarrow
Gem/Stone of the Day: Rose Quartz, Moon Stone,
Foods for the Day: The heart chakra encompasses our ability to give and receive love. When this is area is not in balance, it can leave your heart energy dry and lackluster. Through the process of sharing foods with others in a mutual exchange, you can practice giving and receiving love in a healthy way. The heart chakra blossoms when we express gratitude for eating, donate to food banks, and infuse love into our food and water. Foods for love and compassion: Vegetables, sprouts, raw foods, foods rich in chlorophyll, any green-colored foods.
Medicine Card of Today: Dog Card 14~ Loyalty~ Ask yourself these questions to use Dog Medicine:
1.      Have I recently forgotten that I owe my allegiance to my personal truth in life?
2. Is it possible that gossip or the opinions of others have jaded my loyalty to a certain friend or group?
3. Have I denied or ignored someone who is trying to be my loyal friend?
4.      Have I been loyal and true to my goals?
Tree of the Day:
Yoga Pose of the Day: Heart Salutation
Book to Read Today: Winter Solstice 2013


Wednesday, December 11, 2013

Getting Creative with Shampoo Bars!!

Herbal Shampoo Bars
Shampoo Bars are awesome for so many reasons, #1 it's eco friendly! No plastic bottles, waste, or extra time & money to spend on bottling your shampoo. It's an excellent way to wash your hair with root strengthening, healing and moisturizing herbs and oils. This is actually my favorite way to wash my hair. Their is a slight difference in making a shampoo bar of soap and it's a lower ph level of 7. Below you will find 2 different ways to create your very own biodegradable shampoo soap bar. Have Fun!!
 
 
How to Make an Herbal Shampoo Bar Soap :: Horsetail and Argan Oil :: A Recipe for Damaged Hair
Restore luster.
Shine.
Nourish.
This shampoo bar was created to strengthen damaged hair.
Vitality.
Hair growth.
Rebalance scalp.
Beneficial oils and butters along with magical botanicals combine in this luxurious shampoo.
Argan oil…
…as quoted by Mountain Rose Herbs ”is rich in natural tocopherols (vitamin E) and phenols, carotenes, squalene and fatty acids, making it a truly luxurious oil. Argan oil absorbs quickly and is often used in skin, nail and hair treatments to deliver deep hydration, strengthen brittle hair and nails, and prevent/reduce stretch marks.” It actually penetrates the shaft of the hair improving elasticity and shine.
Horsetail…
…is super high in the mineral silica (the essential element in the production of collagen) – which is known to help strengthen weak, dry, brittle or damaged hair — and when applied to lifeless hair…shine, smoothness and vitality are what remain. Also high in minerals such as potassium, selenium and manganese – horsetail prevents hair loss, promotes hair growth, and contributes flexibility and strength to the hair.
Essential oils…
…of ylang ylang, bay, clary sage, sweet orange, and cedarwood together help with a multitude of hair and scalp conditions such as dandruff. They also stimulate hair growth and restore health to greasy or lifeless hair.
horsetail
Horsetail Shampoo Bar Recipe
Ingredients
Oils
Liquid
Add-Ins
Soap-Making Basics
*
Thanks to the Internet and amazing people who are willing to share their wisdom so freely…I was able to learn the skill. I primarily use the hot processed method…however, choose the method you feel most comfortable with:
  • Wardeh, who runs Gnowfglins, on her personal blog Such Treasures gives the clearest, most easy to follow directions ever! This is the exact post that got me started. She uses the hot processed method and I highly recommend that you read her recipe if you are even the slightest bit interested in making your own soap.
  • Renee of Fimby was also very inspirational and such a great resource! Watch her awesome video that describes the cold processed method for making a simple soap by clicking here.
If you are new to soap-making, I strongly suggest you read through these very informative articles and find what will work for you:
I would also recommend borrowing a few of these books from the library if you really find yourself wanting to know more:
Hot Process Method
*Remember…there are 2 different methods for soap-making — hot and cold process — this is the Hot Process Method.
  1. Measure both the lye and herbal infusion – each in separate bowls — using a kitchen scale. Note: Always run your recipe through a lye calculator to be sure that you are using the proper amount of oils, lye, and liquid.
  2. Carefully combine the lye and herbal infusion by pouring the lye into the liquid (never pour liquid into the lye) and stir liquid until lye is completely dissolved. The liquid is caustic and not to be touched in anyway. The outside of the bowl will be extremely hot as well. Be careful when working with lye and follow all of the recommended precautions. Note: What I’m trying to say is, I can not be held responsible for any craziness, mishaps, explosions, etc. that may happen when making this recipe.
  3. Allow the lye mixture to stay under a vent and cool down while you prepare the oils.
  4. Measure the oils – by weight – and then place in a crock pot to melt on low heat. Please omit the essential oils…we will be adding them later.
  5. Once melted, add the lye/water mixture to the oils in the crock pot and stir. Note: Any equipment the lye touches needs to be neutralized in a mixture of white vinegar, soap, and water.
  6. After a brief stir, grab your stick blender and get to work! Blend the oils and liquid in the crock pot for at least 1-2 minutes. We are working toward “trace.”
  7. After 1-2 minutes, add the horsetail powder. Using a wire whisk, whisk until well combined.
  8. Continue whisking for 2-3 minutes more – until the mixture becomes a thick, pudding like consistency.
  9. Once the mixture is pudding-like, cover the crock pot and “cook” the soap, on low heat, for approximately 1 hour.
  10. Prepare your mold. Note: I just use a standard loaf pan lined with parchment paper and it’s always worked perfectly and this recipe is enough to fill one loaf pan.
  11. Once the soap is done “cooking” remove from heat and quickly add the essential oils and argan oil.
  12. Stir until well combined.
  13. Spoon soap mixture into molds.
  14. Allow soap to cool and harden for 24 hours.
  15. Remove from mold on to cutting board and cut into bars.
Place bars on a tray with good airflow so that they can harden further.


Monday, December 9, 2013

Snow Soap

Winter Snow Soap!
It's winter time fam and I want to make some snow soap! So I am a huge kid when winter time comes and I am so excited that it has snowed already! So I happily went outside and scooped up our first snow into a ziploc bag and it's snow patiently awaiting in our freezer. On Sunday night the little one's got restless and said to heck with the xbox we're going to play in the snow! The also decided to collect their own personal bags of snow to help me make snow soap! This is going to be awesome. So the plan is to make a winter soap for the house and also for loved ones for Christmas. If you are an experienced soap maker it is a very simple thing to implement into the process. Your soap just takes the place of your water! If you are new to soap making familiarize yourself with the basics which are listed in the blog archives and follow the directions below. The recipe below is cold process but we will do ours hot process. We plan to add pine, cypress, a bit of cinnamon and peppermint essential oil for that holiday aroma. Have fun!!

Directions for How to Make Snow Soap

1
Measure out snow and add sodium hydroxide.
Mix thoroughly as snow melts and be sure all sodium hydroxide is thoroughly dissolved into snow water. Set aside. ***This soap recipe assumes basic soap making knowledge. Always wear goggles and gloves and work in a ventilated area when working with lye.
2
Measure and heat oils.
Measure and heat carrier oils. Melt to between 110 and 120 degrees. In a separate container, melt 1oz of Mango butter and melt until liquid. Measure fragrance and essential oils into a separate container and set aside.
3
Add soap colorants to oils.
Add titanium dioxide, diamond dust mica and kaolin clay into the oils and blend until well mixed. Titanium Dioxide tends to clump easily. That is why we are mixing the color into the oils first.
4
Make Soap!
Pour snow lye solution into the melted carrier oils. Mix to a light trace.
5
Additives
At light trace add melted mango butter and mix well. Add in fragrance and essential oil and mix well.
6
Mold
Pour soap into the prepared soap molds. Allow soap 24 - 48 hours to set up.
7
Cure
Remove the soap from the molds and allow them to sit 4 weeks to cure.
Tip
Please watch the instructional video. http://youtu.be/KFM-eH4SWtc

Wednesday, November 27, 2013

Sweet Potatoe & Cranberry Soap

Twas the Night Before Thanksgiving

Twas the night before thanksgiving, the orange leaves fly trough the sky, families coming over for some sweet potato soap pie!! Hey fam are you all cooking away preparing for Thanksgiving? If so save some of those sweet potato's and brown sugar for a lavish and bubbly sweet potato soap. Sweet potato's are awesome in soap, just as good as carrots and pumpkin. Packed with beta carotene and a lush amount of vitamins in minerals all for soft and moisturized skin. Also I have great client testimonials from my famous cranberry soap from last holiday. I used dried cranberries from trader joes mixed in the soap after cooking and topped off on top like a pie! So you can make cranberry soap with a basic recipe using red clay and cranberries. I will cook mine tomorrow how about you!? Recipes to follow below post your pictures if you in for some holiday soap cooking!!
Enjoy!!


This took twice as long in the crock pot as any other soap I've made. But it came out so rich and creamy and yummy smelling. The lather is light tan.  I put real spice lines of ginger, and just a touch of cinnamon and cardamon. Spices alone are not usually strong enough to give a good scent when the soap is done, so I added some essential oils. The result is a heavenly smelling, decadent bar that just makes you feel good to use. Love it.

2 oz beeswax
2.5 oz castor oil
4 oz cocoa butter
8 oz coconut oil
2 oz grapeseed oil
17 oz olive oil
1 oz shea butter
1.6 oz crisco
2 oz sunflower seed oil


3 oz canned pumpkin or cooked sweet potato puree
1 oz warmed honey
1tbs. brown sugar (add sugar to the water before adding the lye)
1tbs. kaolin clay
2 oz essential oil (ex: blend of clove, vanilla, cinnamon)


5.2 oz lye  ( 6% superfatted using Bramble Berry's lye Calc ) Always use gloves and glasses when working with lye (sodium hydroxide). 


10 oz  goats milk ice cubes or cold coconut milk
3.2 oz  rain water

I did not discount the water for the pumpkin or (sweet potato puree)  in this recipe.  If you make this the liquid amount recommended is 13.2 oz,  I just split mine between the milk and rain water.

Always run a soap recipe through a lye calculator before making it yourself.   Be safe.

Check out this video for: Cranberry Soap


Friday, November 22, 2013

Make Lucious Soaps With Milk

Milk Soaps
Happy Friday Fam!! Have you always wondered what makes a lavish, luxury, soft and bubbly soap? Well if so the answer is good ol' milk! Milk is one of those old beauty secrets used for soft and young skin way back in ancient times. One of the most famous recipes for Cleopatra was milk and honey, which kept her amazingly beautiful. There are many cool and easy ways to add milk to your soaps. You can always add it in place of the water when making the lye water solution. You do have to be careful because different milks tend to heat up quicker than water and can burn when the lye hits it. We an also add the milk after the soap has come to trace when making c/p soaps or when the soap is finished cooking with h/p soaps. I prefer adding it after the soap has cooked to maintain all of it's useful benefits. Take a look at the links below for more information on making your very own milk soaps! Have Fun!!!


Tuesday, November 19, 2013

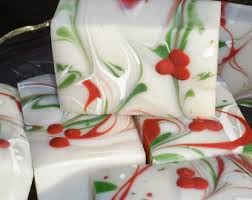
Holiday Soap Cook Off!!

Holiday Soap Cook Off
Seasons Greetings soap fam!! I so love the holidays and Thanksgiving is next week so we got ta get cooking!! So how about a holiday soap cook off? We all inspire to make our favorite holiday soap and we will try them out at our next gathering. It's not a contest but a sharing circle, so everyone wins! So you don't have to disclose your recipe unless you want to, but please bring samples for everyone and we will do a holiday soap swap!! That way everyone will go home with handmade beautiful holiday soaps, it will also give us a chance to get positive feedback from other soapers. Below you will find soap recipes that you can try out or tweak to your liking. Let the cook off begin!!!


Monday, November 18, 2013

Adding Spunk to Your Soaps

Soap Making Additives

Natural Soap Making Additives
There are tons of different natural ingredients that you can add to your homemade soaps to get just the right look and benefits. Below you'll find some of our favorites.
Herbs & Spices
Natural herbs and spices are perfect for adding fragrance and color to your soaps.
  • Basil - Basil is naturally antibacterial.
  • Cinnamon - Powdered cinnamon adds a spicy, homebaked scent and a speckled brown natural hue to your soaps. According to aromatherapy specialists, cinnamon is a stimulant and a stress reliever. Large amounts of cinnamon can cause skin irritation so use sparingly.
  • Chamomile - Chamomile is refreshing and calming. It can also work like a mild astringent.
  • Cloves - Ground cloves can also add a spicy scent to your soaps which is stimulating.
  • Cocoa Powder - Cocoa powder will give a warm brown color to your soaps.
  • Eucalyptus - Eucalyptus can add a refreshing and invigorating aspect to your soaps.
  • Lavender - Lavender can add a wonderful aroma and help relaxation.
  • Lemongrass - Lemongrass is stimulating and cooling.
  • Rosemary - Rosemary adds an herbal scent to your soaps and also helps relaxation. Finely ground rosemary leaves can act as a mild astringent.
Butters & Milks
Try adding small amounts of these ingredients until you get the properties that you're looking for. Start with about 1/4 tsp and add up to 2 tbsp per pound of soap base.
  • Cocoa Butter - Makes your soaps creamy and helps with hardness.
  • Shea Butter - Shea butter is used in soaps as an ultra-moisturizer.
  • Milk - Instant powdered milk can be added to soaps as a natural cleanser. Powdered milk also softens soap, so don't use too much.
  • Coconut or Goat's Milk - You can use about 1 tbsp per pound of soap base. You may want to add some vitamin e if you use fresh milk in your soap to prevent mold.
Other Natural Additives
  • Almond Meal - Almond meal can help absorb excess oil from the skin and unclog pores.
  • Aloe Vera - Aloe vera relieves dry and burned skin.
  • Beeswax - Beeswax is used as a hardening agent in soaps, lotions, and lip balms. It also has a wonderful fragrant aroma.
  • Calendula Petals - Calendula petals are great for soap in that they hold their beautiful golden color well, adding a natural colorant to your soaps.
  • Clay - Glacial and Bentonite are two of most popular clays used in soap making. Clay is often used in soaps for those with oily skin. Clay can draw excess oil from the skin. Clay is also used in shaving soaps to create a nice glide on the skin.
  • Corn Meal - Corn meal is another type of exfoliant that can be added to your soaps.
  • Coffee Grounds - Coffee is commonly used as a natural deodorizer.
  • Ground Apricot Seed - Wonderful exfoliant for skin. Use very fine ground seed for a facial soap or more coarse ground seed for less delicate areas such as feet.
  • Honey - Honey can be used as a relaxant in soaps. If you use too much, your soap will be too soft.
  • Oatmeal - You can use regular oats that are whole or ground in soaps to soothe and gently exfoliate skin.
  • Poppy Seeds - Poppy seeds are a gentle exfoliant. They add an interesting look and texture to your soaps
  • Sugar/Salt - Sugar and salt can be used as a wonderful natural exfoliants.
  • Vitamin E - Vitamin E is nature's antioxidant. Vitamin E is often used as a preservative when you add fresh fruit or other additives that can spoil.
Tips for Using Additives in Soaps
  • Having your additives just on the tops of your soaps gives them a unique look. To do this, simply place your additives in the mold before you pour your soap.
  • To get your additives suspended throughout your soaps you'll have to work a little harder. Naturally your additives will want to sink to the bottom of your soaps. To get them suspended, add your additives to your soap base before you pour into the mold. Gently stir your soap allowing it to cool and get thicker. When you notice your soap starting to thicken, you can pour it into the mold. This takes a little practice. If your soap base gets too thick on you, you can always remelt it and start over again.
  • You can avoid clumping by separating out a small amount of your soap base into a small dish. Mix the additive into this soap base until you get an even paste. Then stir it all back into the rest of your soap.

Friday, November 15, 2013

Essential Oils & Soap Making

Essential Oils & Soap Making

Hey there my soapy fam! We will discuss some very important tips for using Essential Oils in Soap Making.

One of the most frequent questions I am asked during soap class is "Which essential oils should I buy to have on hand for soapmaking at home?" It's a very good question for several reasons.

First, essential oils are one of the most expensive ingredients in soapmaking. It's wise to be selective as you won't want to buy 12 or 15 essential oils as you ease into your new craft. Remember, you are adding 0.5 oz of essential oil per pound of oils in your recipe. So if you are creating a batch of soap that requires four pounds of oil, you will be adding 2 oz. of essential oil. It can be one essential oil or a blend of oils, but right around 2 oz. Some soapers use a bit more, and others use a bit less. As you become experienced, you get a feel for your particular oils and their staying power.

Second, if you narrow down your oils to the top five, you can purchase in larger quantities (I recommend 16 oz. of each) for best pricing. Most suppliers charge more per ounce on 2 oz. or 4 oz. than they do on a 16 oz. or pound of essential oil. So you're spending your money wisely up front.

Lastly, if you choose your top five wisely, you'll end up with blending options. This means besides making a one-scent batch, you can also make a two or three-scent batch.
In the natural skincare and soap classes I teach, students use only essential oils. These are derived from nature - from herbs, flowers, fruits and more. They provide physiological and psychological benefits. For example, two of lavender essential oil's many physiological benefits is that it aids in relief of psoriasis and skin wounds. One of its psychological benefits is that it is calming. You'll want to choose essential oils based on their essence as well as for the healing properties they provide.

Note for new soapmakers: Fragrance oils are synthetic and man made. They do not have physical, emotional or other healing properties. If you are using fragrance oils just confirm that they are intended for use in soap making and ask your supplier if they perform well or if there are any known problems.
Here are my Top Five Essential Oils for Soapmaking:
Lavender

Properties: Calming, soothing and relaxing, which helps those with stress and nervous tension, headaches and migraines. It is a natural choice for healing many skin conditions such as acne, bruises, burns, dermititis, eczema, inflammation, psoriasis, sunburn and wounds to name a few.
Blending: It blends well with many oils, from citrus to florals.

Rosemary

Properties: Rosemary immediately alters my mood. If I'm feeling a bit down, just a little sniff will help restore and balance my mental state. In addition, it is wonderful to use to aid in dermatitis, acne, eczema, and your boosting immune system.
Blending: Try blending with lavender, peppermint, cedarwood, basil, and lemongrass.Note: Rosemary should not be used by individuals who are pregnant or who suffer from epilepsy.

Peppermint
 
Properties: Refreshing, restorative and a wonderful stimulant. It aids in circulation, muscular pain, can relieve asthma, and boosts the immune system.
Blending: Works well with rosemary, lemon, eucalyptus and of course lavender just to name a few.

Patchouli

Properties: Calming in small amounts, and uplifting in larger amounts. A known anti-inflammatory and useful in relieving dry skin.
Blending: Patchouli is one of several essential oils known to "anchor" scents. Use in small amounts, even when blending, as it can easily become overpowering. Blends well with lavender, lemongrass, rosemary, bergamot, clary sage and many more.


Lemongrass:

Properties: Uplifting and refreshing (one of my favorites for a kitchen soap). Aids in healing of acne and improves muscle tone.
Blending: Works well with citrus oils, lavender, geranium and bergamot. I love it with
peppermint or eucalyptus. It is exceptional with a bit of patchouli.

Suggested Blends based on 4 oz. oil:Lavender (2.5 oz.), Rosemary (1 oz.) and Patchouli (o.5 oz.)
Lemongrass (3 oz.) and Peppermint (1 oz.)

Lemongrass (3.5 oz.) and Patchouli (0.5 oz.)
Lavender (3.5 oz.) and Patchouli (0.5 oz.)

Rosemary (2 oz.) and Lemongrass (2 oz.)
Lavender (3oz.) and Peppermint (1oz.)Peppermint (3 oz.) Patchouli (1 oz.)

It was challenging to pick just five, as Orange and Ylang Ylang would have both been next on my list along with Frankinsence, Myrrh, Sandalwood and Tea Tree.

-Via Back Porch Soap Company


Wednesday, November 13, 2013

Herbal Soaps for Color & Healing

Herbal Soaps for Color & Healing
 
Soaps are so much funner with color! My journey into soap making started with herbal soaps of course but not for color just healing. My soaps were the natural color off white sprinkled with bejeweled herbs and roots and sometimes some essential oils infused in them. It was fun then because it was what I knew. As I got deeper into soap making I found the art within and began to create and play with natural colors. We all know to get a child to take her medicine we have to disguise it a bit sometimes. For me I make a nice herb tea for my boys during cold season and mix it half n half with their favorite juice. Walaa! So for some of our clients they may have acne, dry, eczema, oily or scarred skin and desire a medicinal or healing soap. We all know we don't typically like the smell of medicinal soap, and we also seem to get stuck with that plain jane soap just because it's medicinal, doesn't sound exciting huh? So why not get a good bang for your buck and create some healing soaps with natural color from herbs. Awesome! There are so many easy to grow or affordable ways to purchase herbaceous plants that will take your soaps to the next level. In this article we will discuss ways to extract the color from the herb to your soaps using oils! If you are interested in learning about which herbs will produce a certain color please visit Natural Soap Colorants. Enjoy!!
 
Extracting colors from herbs:
So there's more than one way to extract colors from herbs, and certain extraction methods work better for some herbs than others. To find out which method will work best for the particular herb and color you are working with research and experimenting is your best friend. Let's get started:
 
Color Soap Naturally-via lovin soap


Infusing oil is probably my favorite method of using natural colorants. It works for most natural colorants but we’ll talk about the ones that do better using a different method as we go along. When you infuse oil you don’t get the grainy speckled look you get when you add spice or herb powders to traced soap.
You want to be sure to use a long shelf life oil for infusing.The top three are fractionated coconut oil, jojoba oil and olive oil. I usually stick with olive oil as all of my soap recipes contain olive oil.
There are two main methods of infusing oils.
Cold infusion –Add spices or herbs to the oil in a jar and allow to sit 2-6 weeks to infuse. If I’m infusing powdered spices or herbs I infuse 2 tablespoons in 5 oz oil. If I am using dry whole herbs then I’ll fill the jar with the herb and cover with oil. Never use fresh herbs in cold infusions as they contain water and will cause mold and bacteria to grow.
Heat infusion –Add spices or herbs to the oil and heat gently to kick start the infusion. Some spices and herbs infuse easily using the heat infusion method and you can even use the infusion the same day! You can heat using the crock pot turned to warm for 2-6 hours or low heat on the stove for 2-6 hours. You can use fresh herbs in a heat infusion if you plan on using the oil in soap making the same day. Don’t ever store away an infusion made with fresh herbs as they contain water and your infusion will grow bacteria and mold.
My favorite method is to use a hot water bath to gently heat the infusions. I seal the herbs and spices in heat sealable tea bags so I don’t have to worry about straining the infusion before I use it. I just simply remove the tea bag. Here’s how I do it.
I usually infuse 2 tablespoons of any powdered herb or spice into 5 ounces of olive oil.
Step 1 – Measure out 2 tablespoons of your powdered herb into a heat sealable tea bag.
 
Step 2 – Seal the edge with an iron.  Make sure it is sealed and will not come open.
Step 3 – Place the sealed teabag into the canning jar and cover with 5 oz (weight) of olive oil.
Step 4 – Screw on the lid and secure tightly.  If you’re doing many infusions at once make sure you label them so you don’t forget what they are.  I just use a permanent marker on the lid.
Step 5 – Place your jars into a pan.  Fill the pan with enough water to reach about 1” underneath the lid.  You want the water to stay plenty beneath the bottom of the jar lids.
Step 6 – Turn the heat on low and let heat for about two hours.  You can also do this in a crock pot.  Just set the crock pot on warm.
Step 7 – Remove the jars from the pan and allow them to cool away from cool air or drafts.  You don’t want the jars to break.  I typically put my jars on the counter and cover with a towel to keep out the drafts or air if it kicks on.  Check the color of your infusions.  Some herbs and spices infuse easier than others.  I noticed the alkanet, paprika, indigo, turmeric and annatto all looked nice and dark.  But some of the others looked like they needed a bit more time.  You can either heat for another hour or two or if you aren’t in a hurry to use them…let them sit somewhere out of the way for a week to get a darker infusion.
That’s it!  Wasn’t that easy?  And the best part is that since we used the tea bags to contain the spices and herbs we don’t have to bother with straining which can be a mess!
To use your infused oils simply replace a portion of olive oil in a recipe with infused olive oil.  We’ll go into more detail later on in the series. 
Happy Soaping!